What is Azure Arc ?
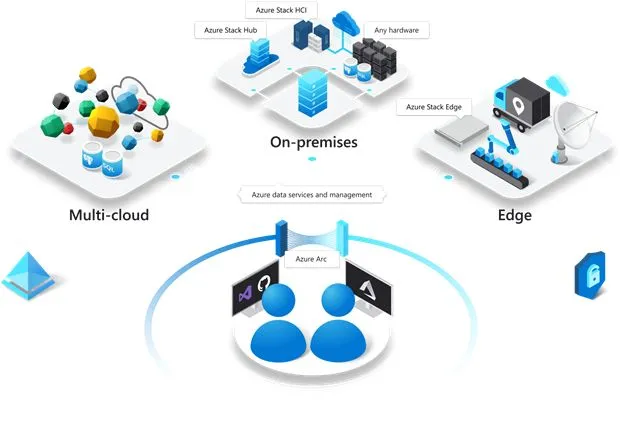
According to Microsoft, Azure Arc is a bridge that extends the Azure platform to help you build applications and services with the flexibility to run across datacenters, at the edge, and in multi-cloud environments.
In simple words, Azure Arc is designed to allow you to manage resource on-premises, other public cloud (AWS, GCP, Alibaba, etc.) and edge devices (IoT) from Azure Portal.
Currently, the supported resource types which are hosted outside of Azure are the following:
- Physical and Virtual Windows and Linux Servers
- Kubernetes Clusters
- Azure data services (SQL Managed Instance and PostgreSQL Hyperscale)
- SQL Server
- VMWare vSphere or Azure Stack HCI
Why Azure Arc ?
The benefits of using Azure Arc are the following:
- Centralize platform (Azure) to manage all resources (Azure, on-premises and multi-cloud)
- Deploy policies and maintain compliance and governance
- Utilize Azure Security Center
- Patching Management
- Azure Monitor — Forward event viewer logs to your SIEM
- Utilize RBAC, tagging and identity policies
- Use Automation like extension where you can install application that provide post-deployment configuration
- There’s no cost to start. Just pay for policies and other azure services that is attached. (e.g. Azure Defender or Azure Monitor)
How to onboard on-premise or multi-cloud resource ?
Onboarding is very simple either if you want to onboard one or multiple servers.
From Azure Portal search for Azure Arc:

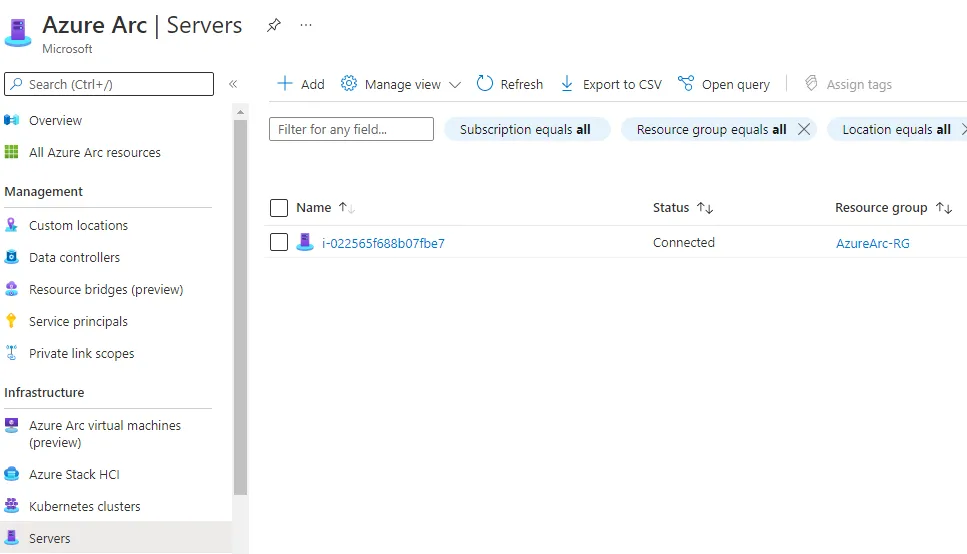
At left-hand side, under Infrastructure click Servers and then Add:

For the purpose of the demo, we are going to onboard a single server. Click Generate Script and make sure that the following 3 prerequisites are met on the server that you are going to onboard:

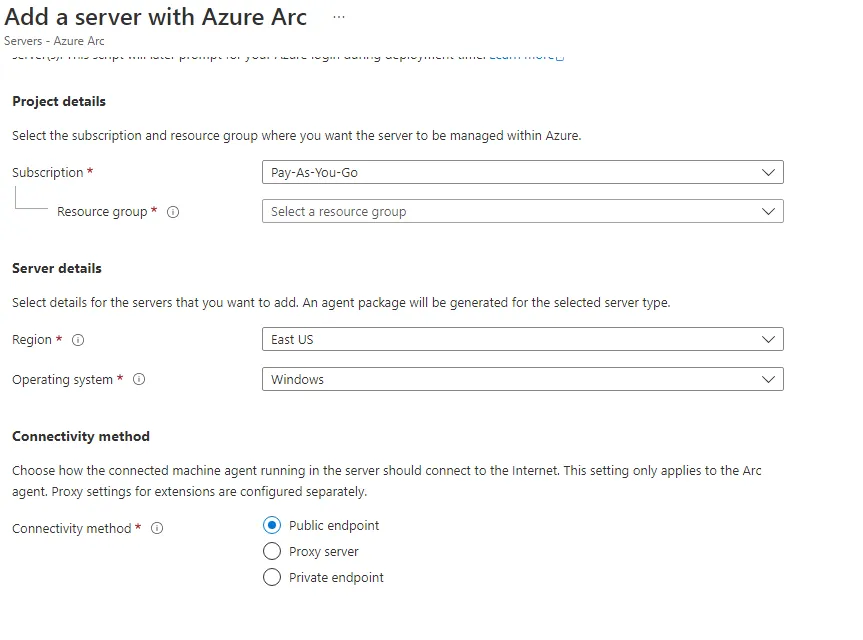
Click Next and fill the relevant details:
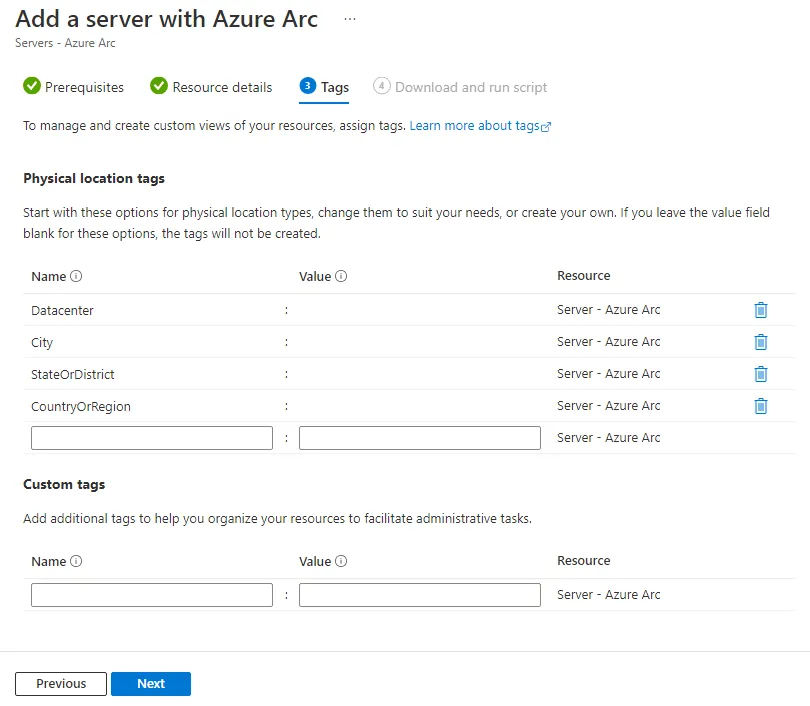
Add your tags (optional) and click Next:
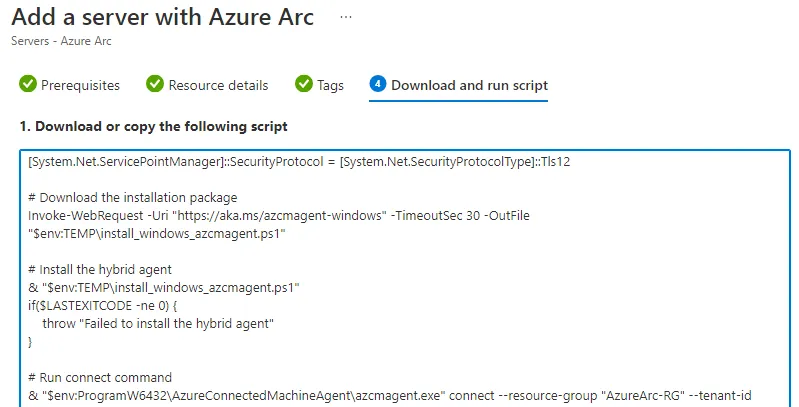
Open Powershell on your Virtual Machine as Administrator and execute the generated script:
Once installed, navigate to Azure Arc → Under Infrastructure → Servers. The status of your server should be Connected:
How to abuse Azure Arc for lateral movement ?
Now, that we learnt what is Azure Arc and what are the benefits of using it, it’s time to learn how to abuse Azure Arc in order to laterally move to on-premise or other public cloud.
One of the attack vector for Azure Arc onboarded servers is the execution of custom scripts using the Extensions option. (“Windows Admin Center” is another attack vector and will be discussed in a different blog post.) It should be noted that, the service executing the script is running as Local System privileges.
All roles with “Microsoft.HybridCompute/machines/extensions/write” permission are able to install or update an Azure Arc Extension. During my research, I was able to identify some of them:
- Owner
- Contributor
- Azure Connected Machine Resource Administrator
- Hybrid Server Resource Administrator
- Windows Admin Center Administrator Login
Attack Path:
Assume that during an engagement you managed to compromise a user with “Azure Connected Machine Resource Administrator” role and you have been tasked to move laterally to on-premise or to other public cloud environment of the organization.
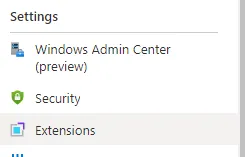
Using the compromised account click on the name of the server that you have the permission and under Settings click Extensions:
Next, click +Add, select Custom Script Extension for Windows — Azure Arc and then Next. It is required to browse and upload a script from storage account. In our case, we don’t have access neither to create a storage or upload our “malicious” script into an existing storage.
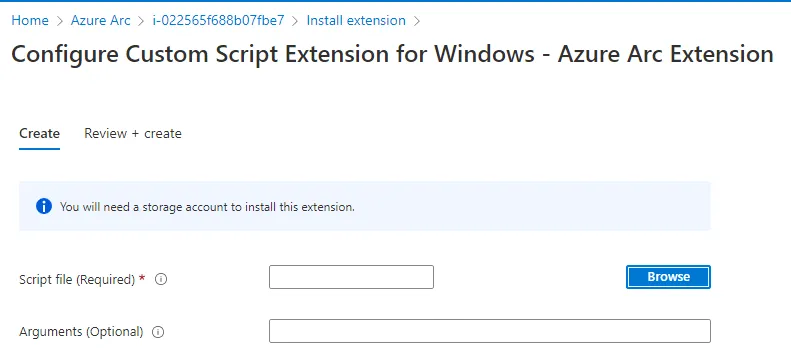
In order to bypass the required script file from storage account, we will use Azure Command-Line Interface (CLI). Azure CLI is a cross-platform command-line tool and it can be used to connect to Azure and execute administrative commands on Azure resources.
Once installed, the az extension that we need to use is: connectedmachine.
The required parameters are:
- machine-name
- resource-group
- name (This is the extension name)
- type
- publisher
- settings
- location
Execute the below commands and retrieve the local IP address of the server:
Use Nishang Invoke-PowerShellTcp script and receive an interactive shell on the machine:
Bonus — Living Off the Land Binaries
Navigate to Azure Arc installation folder “C:\Program Files\AzureConnectedMachineAgent\GCArcService\GC” and you will find the following binaries:
- createdump.exe — You can use it to dump lsass.exe or any other process rather than using mimikatz. (Admin or System rights is required.)
- pwsh.exe — Use pwsh.exe rather than the default powershell in order to avoid detection.

Bonus — Search for sensitive data
Azure Arc Extensions stores the data in clear-text under: “C:\Packages\Plugins”

If you have remote code execution on an Azure VM or a machine which is managed by Azure Arc make sure to enumerate all plugins for sensitive data.
Detection:
- Monitor all installed extensions
- Reduce the number of privilege users following the least privilege principle
- Monitor change tracking
- Block Azure CLI tools using Conditional Access Policy
- Monitor your servers’ activities for malicious command execution
- Use just-in-time access policy by enabling Privileged Identity Management (PIM)
Acknowledgements:
Thanks to Karl Fosaaen and Jake Karnes for there previous research in similar subject.
References:
- https://docs.microsoft.com/en-us/azure/azure-arc/overview
- https://www.youtube.com/watch?v=QEU0h8BR7Yg&list=PLmUYzTQ_N_m-h4f75sIKeHzprp9RGJZWv
- https://www.netspi.com/blog/technical/cloud-penetration-testing/abusing-azure-hybrid-workers-for-privilege-escalation
- https://www.forbes.com/sites/janakirammsv/2019/11/05/why-azure-arc-is-a-game-changer-for-microsoft/?sh=5aed0fe95430
- https://edyoung.github.io/blog/arc_cheat_sheet/
